15
Jan
How to Handle Tough Stains: Rust, Efflorescence, Oxidation, Acorn Stains & More
As a pressure washing professional, you’ll quickly realize that not all stains are the same. Some stains can be incredibly stubborn, especially when dealing with things like rust, efflorescence, and oil. These kinds of stains require specialized techniques and products to remove them effectively. In this post, we’ll dive into how to handle the most common tough stains you may encounter, including rust, efflorescence, oxidation, acorn stains, oil, mud, red clay, and even a few more. Let’s get started!
1. Rust Stains: A Common Nightmare
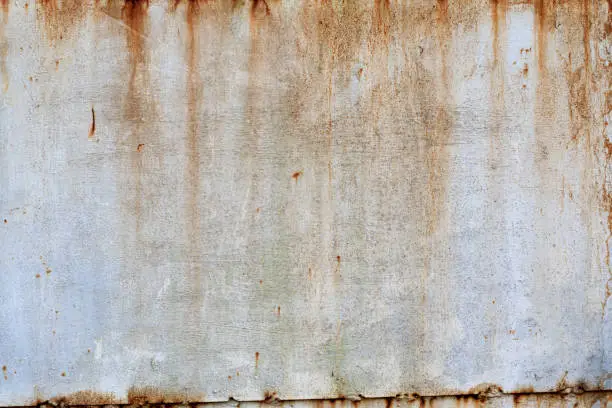
Rust stains are some of the most frustrating to tackle, especially when they appear on concrete or masonry surfaces. These stains typically result from metal objects like patio furniture, grills, or even rusting downspouts. The iron in these materials reacts with water and air, forming iron oxide, which leaves behind that signature reddish-brown discoloration.
How to Clean It:
- Start by using a rust remover specifically designed for concrete or masonry surfaces. These products contain chemicals like oxalic or hydrochloric acid, which break down the rust and lift it from the surface. For a great rust removing product, try Onerestore here.
- If you’re dealing with a stubborn stain, apply the cleaner and let it sit for about 10-15 minutes before scrubbing.
- Afterward, use your pressure washer with a fan nozzle (to avoid excessive force) to rinse away the residue and lift any remaining particles.
Alternative Options:
- You can also try a baking soda paste for a more natural solution. Mix baking soda with water to form a thick paste, apply it to the rust stain, and scrub it off with a wire brush. This method can be effective for lighter rust marks.
Tip: Always wear gloves and goggles when working with chemical rust removers to ensure your safety, avoid unknowingly mixing baking soda with other products to avoid creating potentially hazardous substances.
2. Efflorescence: White Powder on Concrete or Brick
Efflorescence is that annoying white, chalky residue you often see on concrete, brick, or stone surfaces. It happens when moisture travels through porous materials, bringing soluble salts with it. Once the water evaporates, the salts are left behind on the surface, creating those unsightly white stains.
How to Clean It:
- For light cases, start by using a stiff brush and a mild detergent solution (like dish soap and warm water). Scrub the area thoroughly to loosen and remove the powder.
- If the efflorescence persists, use a specialized efflorescence remover such as EFFORTLESS, which contains acid or other ingredients to break down the salts.
- After the cleaner has been applied and allowed to sit for about 15 minutes, rinse the surface with a pressure washer to remove any excess cleaner.
Alternative Methods:
- Vinegar and water: Mix a 50/50 solution of white vinegar and water. Apply it to the affected area, let it sit for a few minutes, and then scrub. Rinse thoroughly afterward.
Tip: Always ensure that the root cause of the moisture is addressed (such as fixing leaking pipes or improving drainage) to prevent efflorescence from recurring.
3. Oxidation: Fading and Discoloration on Metals
Oxidation occurs when metals like aluminum, copper, or steel react with oxygen in the air, leading to discoloration, dullness, or a chalky residue, particularly on items like fences, gutters, or window frames. Over time, oxidation can degrade the appearance of your metal surfaces, especially in areas with high humidity.
How to Clean It:
- Use a commercial oxidation remover, which is specially designed for the surface containing oxidation. These cleaners will help dissolve the oxidation and bring the surface back to life.
- For aluminum and stainless steel, apply the cleaner and let it sit for 10-15 minutes. Afterward, scrub the area with a soft brush to avoid scratching the surface, most "brushless" oxidation removers will still need to be brushed when treating for heavy oxidation buildup.
- Once the oxidation has been lifted, rinse the area thoroughly with your pressure washer to remove any remaining residue.
Alternative Methods:
- For light oxidation, a baking soda paste (mixing baking soda with water) can also work. Apply the paste to the affected areas, scrub with a brush, and rinse.
Tip: Be gentle when pressure washing oxidation off metal surfaces to prevent scratching or damaging the finish.
4. Acorn Stains: The Hidden Fall Culprit
If you're in an area with a lot of oak trees, you might have encountered acorn stains. These stains are caused by tannins from the acorns, which can create dark, stubborn spots on concrete, wood decks, or stone. While these stains are more common in the fall, they can last well beyond the season if not treated.
How to Clean It:
- Start by sweeping up any leftover acorns, as leaving them on surfaces for too long can cause more staining.
- Use a mild detergent and water solution for light acorn stains. Apply it to the stained area and scrub with a stiff brush.
- For more persistent stains, use a deck cleaner or an acid-based cleaner for concrete. These products can break down the tannins and lift the stain from the surface. Oxalic acid and products containing it do great for this purpose. Sodium hypochlorite may also be able to remove acorn stains at a high enough strength.
- Finish by pressure washing the area to remove any residue.
Tip: Prevent acorn stains by regularly sweeping up fallen acorns and leaves. A quick cleaning after each storm can keep your surfaces looking fresh.
5. Oil Stains: The Classic Toughie
Oil stains are notoriously difficult to remove, particularly on driveways and garage floors where oil leaks from cars or equipment. These stains are greasy and can be very persistent, often seeping into porous materials like concrete.
How to Clean It:
- Degreasers are your best friend when it comes to oil stains. Apply a generous amount of degreaser to the stained area and let it sit for 10-15 minutes to break down the oil.
- Afterward, scrub the area with a stiff brush to help lift the oil from the surface.
- Rinse the area thoroughly with your pressure washer. For tough stains, you may need to repeat the process.
Alternative Methods:
- Absorbent materials like kitty litter or sawdust can help soak up excess oil before you clean. Spread the material over the stain, let it sit for several hours, and then dispose of it before cleaning the remaining stain.
Tip: For fresh oil stains, act quickly— the longer oil sits on the surface, the harder it will be to remove.
6. Mud and Dirt Stains: A Pressure Washing Essential
Mud and dirt stains are incredibly common, especially in areas with frequent rainfall or on construction sites. They can easily accumulate on driveways, sidewalks, and patios, and while they may seem simple to remove, they can be more stubborn than you think.
How to Clean It:
- Use your pressure washer to blast away loose mud and dirt. Start with a lower pressure setting to avoid damaging delicate surfaces like wood or asphalt.
- For stubborn dirt, apply a mild detergent and scrub with a stiff-bristled brush. The detergent will help break down the mud and make it easier to wash away.
- Use the pressure washer again to rinse off the cleaning solution and loosened dirt.
Tip: If you're dealing with a lot of dirt buildup, consider using a surface cleaner attachment to cover more ground efficiently.
7. Red Clay Stains: A Southern Challenge
Red clay stains are especially common in southern areas or places with heavy clay soils. These stains can be tough to remove, as the natural color of red clay can seep deep into porous surfaces like concrete, stone, and brick.
How to Clean It:
- Start by rinsing off any excess clay with your pressure washer, but don’t go too high on the pressure setting, as this can push the stain deeper.
- Use a mild acid cleaner to break down the clay residue. A mixture of vinegar and water or a commercial concrete cleaner can help lift the stain.
- For stubborn stains, apply a concrete degreaser and scrub with a stiff brush before rinsing the surface thoroughly with a pressure washer.
Tip: For particularly bad stains, you may need to repeat the process a couple of times.
8. Mold and Mildew: The Year-Round Foe
Mold and mildew thrive in damp, shaded areas, making them a common issue for pressure washing professionals. These fungal growths can discolor surfaces and, if left untreated, cause long-term damage. Mold typically looks black or green, while mildew appears as white patches.
How to Clean It:
- Sodium hypochlorite, herein referred to as bleach, is highly effective at killing mold and mildew. Mix 1 part 12.5% bleach to 12.5 parts water to get a bleach strength of 1% (Don't forget to account for machine dultion if using a chemical injector), and apply it directly to the affected areas such as vinyl, for brick, asphalt shingles, and other surfaces, you will need a stronger mix, see here for strength recommendations.
- Let it sit for 10-15 minutes, then scrub with a brush to lift the mold or mildew from the surface.
- Once you’ve scrubbed the surface, rinse the area with your pressure washer to remove any remaining spores.
Alternative Methods:
- Mold and mildew removers are often formulated for specific surfaces like decks, patios, or siding. Be sure to choose the right one for the material you're cleaning however keep in mind that just bleach is more than enough for almost any organic growth.
Tip: Always test your cleaning solution in a small, inconspicuous area first, especially when using bleach or strong chemicals.
Final Thoughts
Tough stains are an inevitable part of the pressure washing business, but with the right tools, techniques, and products, you can handle even the most stubborn spots with ease. From rust and efflorescence to oil and red clay, each stain presents a unique challenge—but with persistence and knowledge, you'll be able to tackle them head-on. Keep these tips in mind the next time you face a tough stain, and remember: consistency is key! See our full chemical lineup here.